In this post I talk about the design and implementation of the enemy AI.
Why FSM
We had a tight 9-week deadline to release the project. The main goals were to have a product released on Steam by the end of the semester and to create something that we could be proud of.
After considering all the critical challenges and the AI’s required functionality, I decided that a basic Finite State Machine (FSM) was the best option due to its simplicity. Additionally, we didn’t need too many different states for the AI, which would help prevent the design from becoming overly complex.
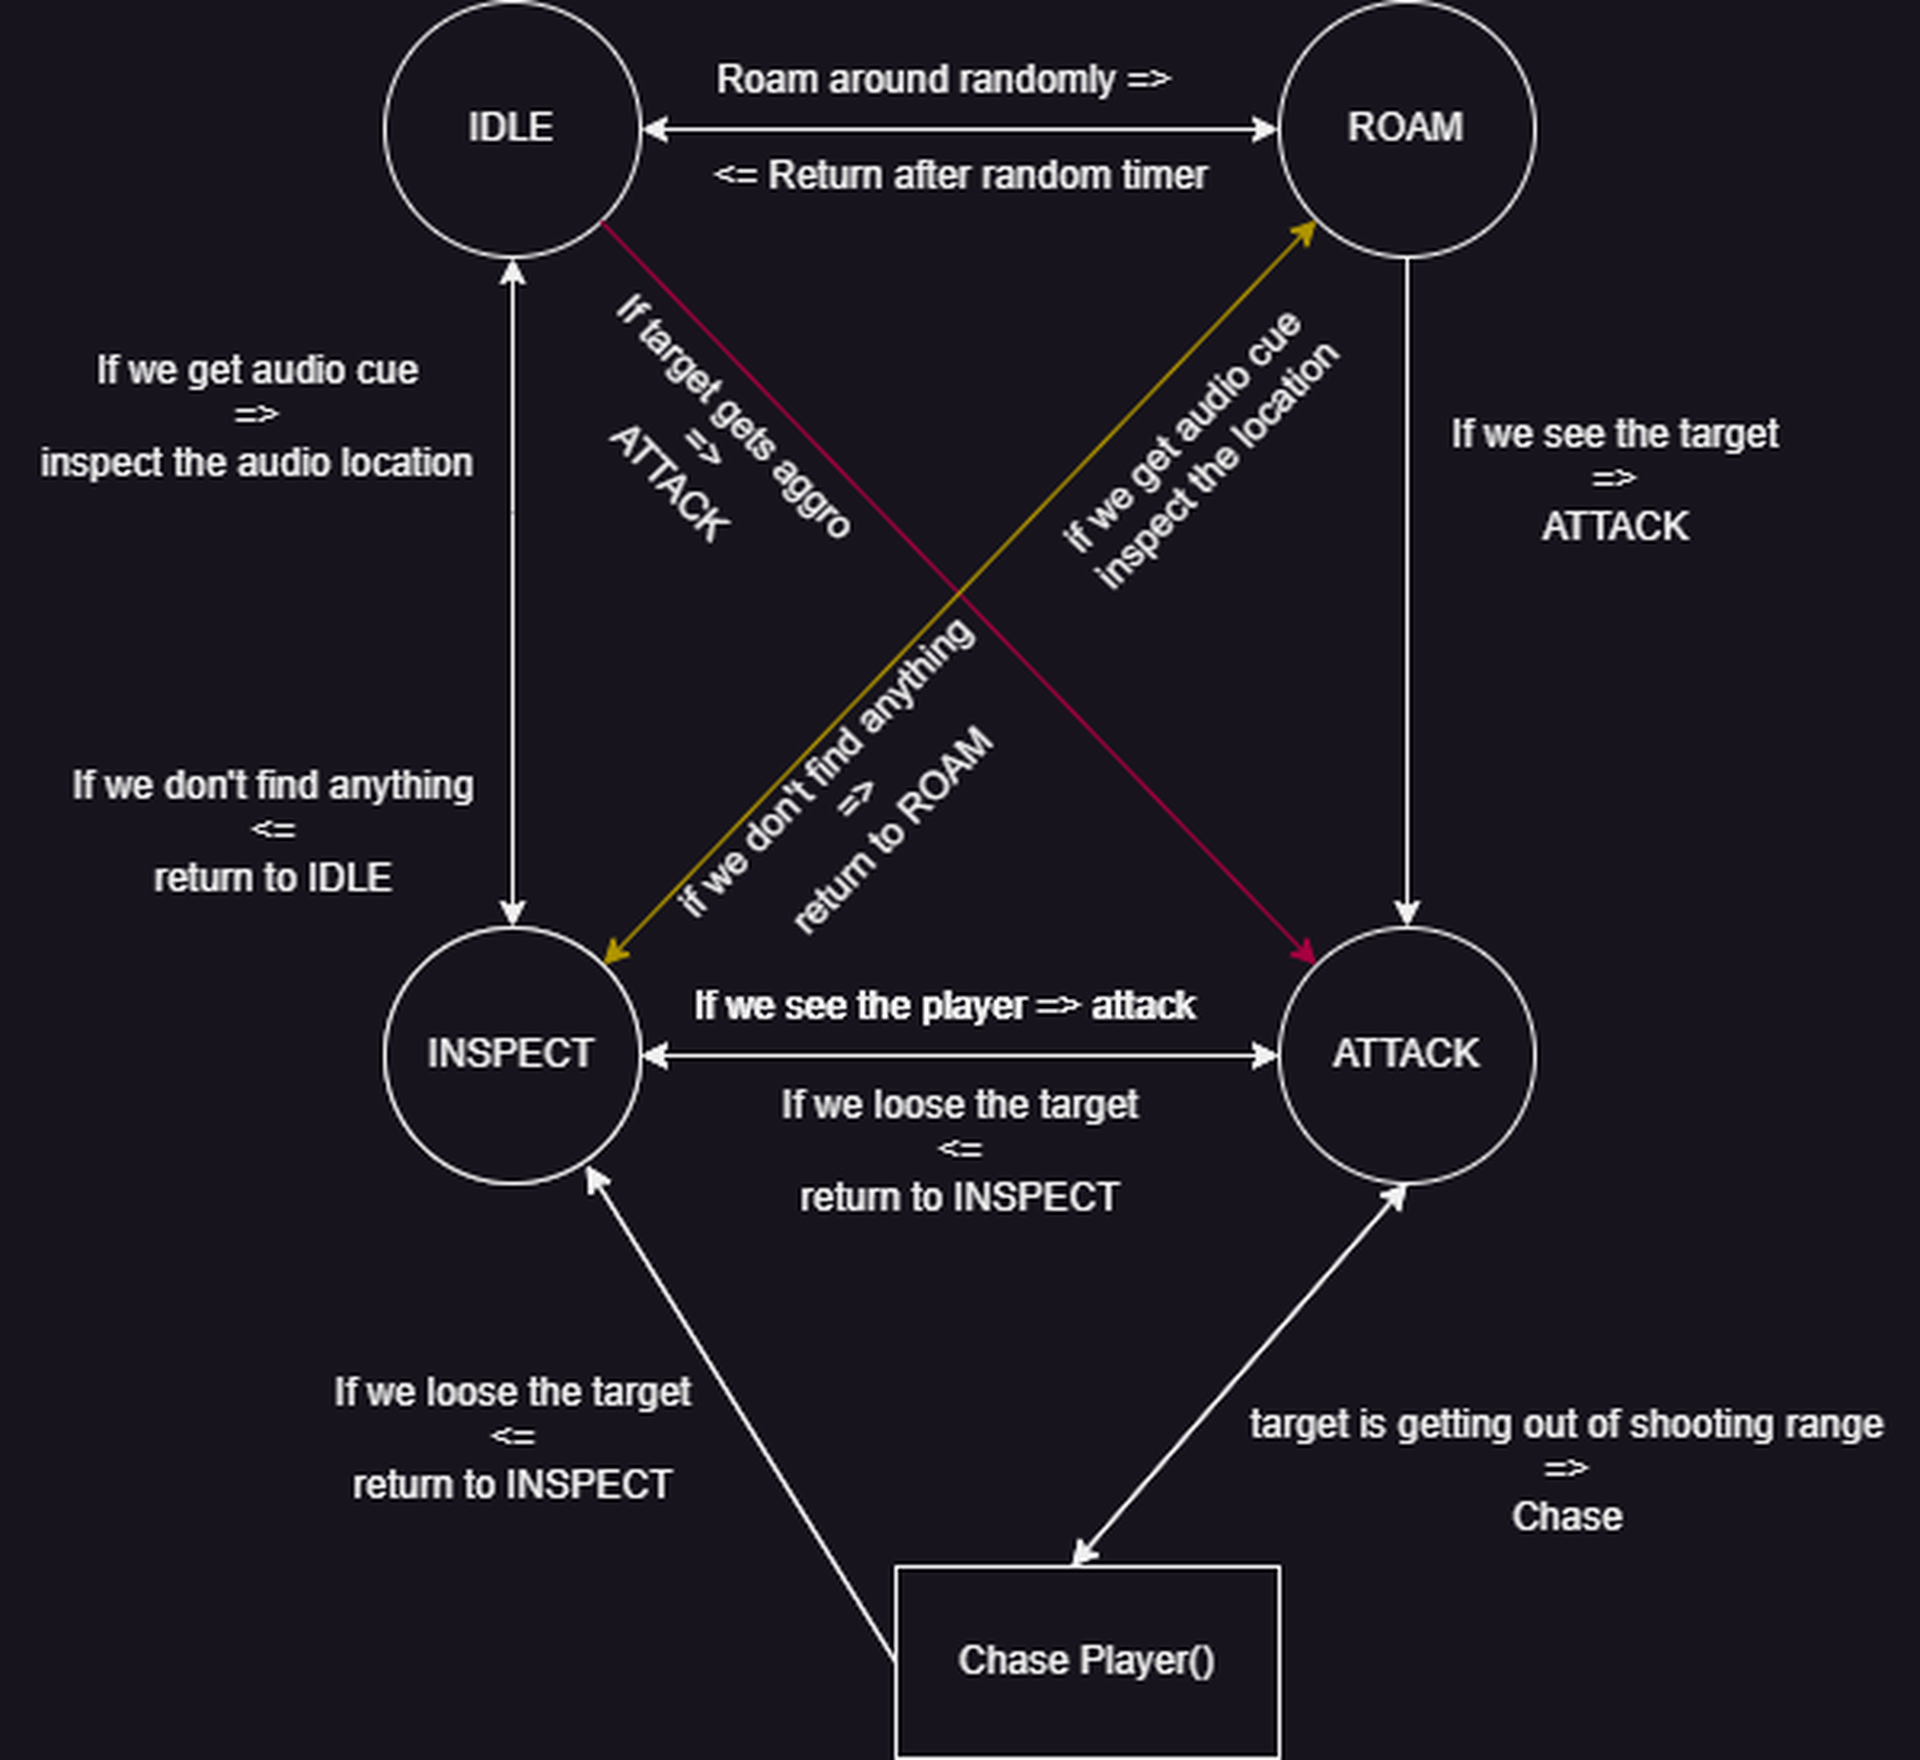
Before starting to code anything. I created a diagram of the state loops, so I would have something more visual to use as a reference while programming the AI. This would help me in the future to debug in case of any issues, and potentially help others who want to work with the AI.

The Code
First, I created the core loop for the states.
To handle the variables that enable switches between the states, I created a script called enemyAwareness which uses raycasts and spherecasts to detect the target.
This allows the movement and shooting scripts to only receive the target’s position as an argument if the target is detected by the AI.
In a somewhat bad practice, I wrote all the different states in the same FSM script.
However, I did split these states into their own regions, e.g., #region ATTACK. So, refactoring all these states into their own scripts wouldn’t be too complicated or time-consuming.
I misjudged the amount of code I would end up writing for these states, and to save time, I just kept thinking that I’d clean it up later. This is the only script that I feel a little bit bad about, since everything else I did was tidy and compact.
Optimization
The performance of the AI was significantly impacted in one of our levels due to the large number of enemies and the multiple raycast being used.
To improve the performance, I implemented 2 optimization techniques.
-
To increase the AI’s efficiency, I implemented a strategy where a single
raycastis used until the target is within the AI’s view range. At that point, additionalraycastandspherecasts are used to check for line of sight, aggro range, and hearing range. -
By implementing a custom fixed update loop for the
GetAggrofunction, I was able to significantly improve the AI’s performance and resulted in a notable drop in the profiler.
Unfortunately, I don’t have any screenshots of the profiler.
private void GetAggro() {
    // Check if the target is within the AI's view range
    if (IsTargetInViewRange()) {
        // If the target is within the AI's line of sight, the AI can see the target.
        if (IsInLineOfSight()) { // Check if the target is within the AI's line of sight.
        // Code to check for aggro range, hear range, etc.
        }
    }
}
Shooting
To prevent the AI from randomly firing at ramps or walls when it can see a target, I implemented a solution that involves using a raycast from the gun’s barrel position to determine if the target is within the gun’s line of sight.
If the target is visible from both the gun’s barrel position and the AI’s eye position, only then is the AI allowed to shoot.
Debugging
There were quite a few edge cases that ended up needing fixes.
To help myself and others debug in case there are issues, I created a few debug gizmos that showed all the key variable values in a more visual manner inside the editor.
These included:
- A sphere around the AI to showcase the hearing range
DrawSphere&DrawWireSphereto showcase the line of sight & other direction-related casts
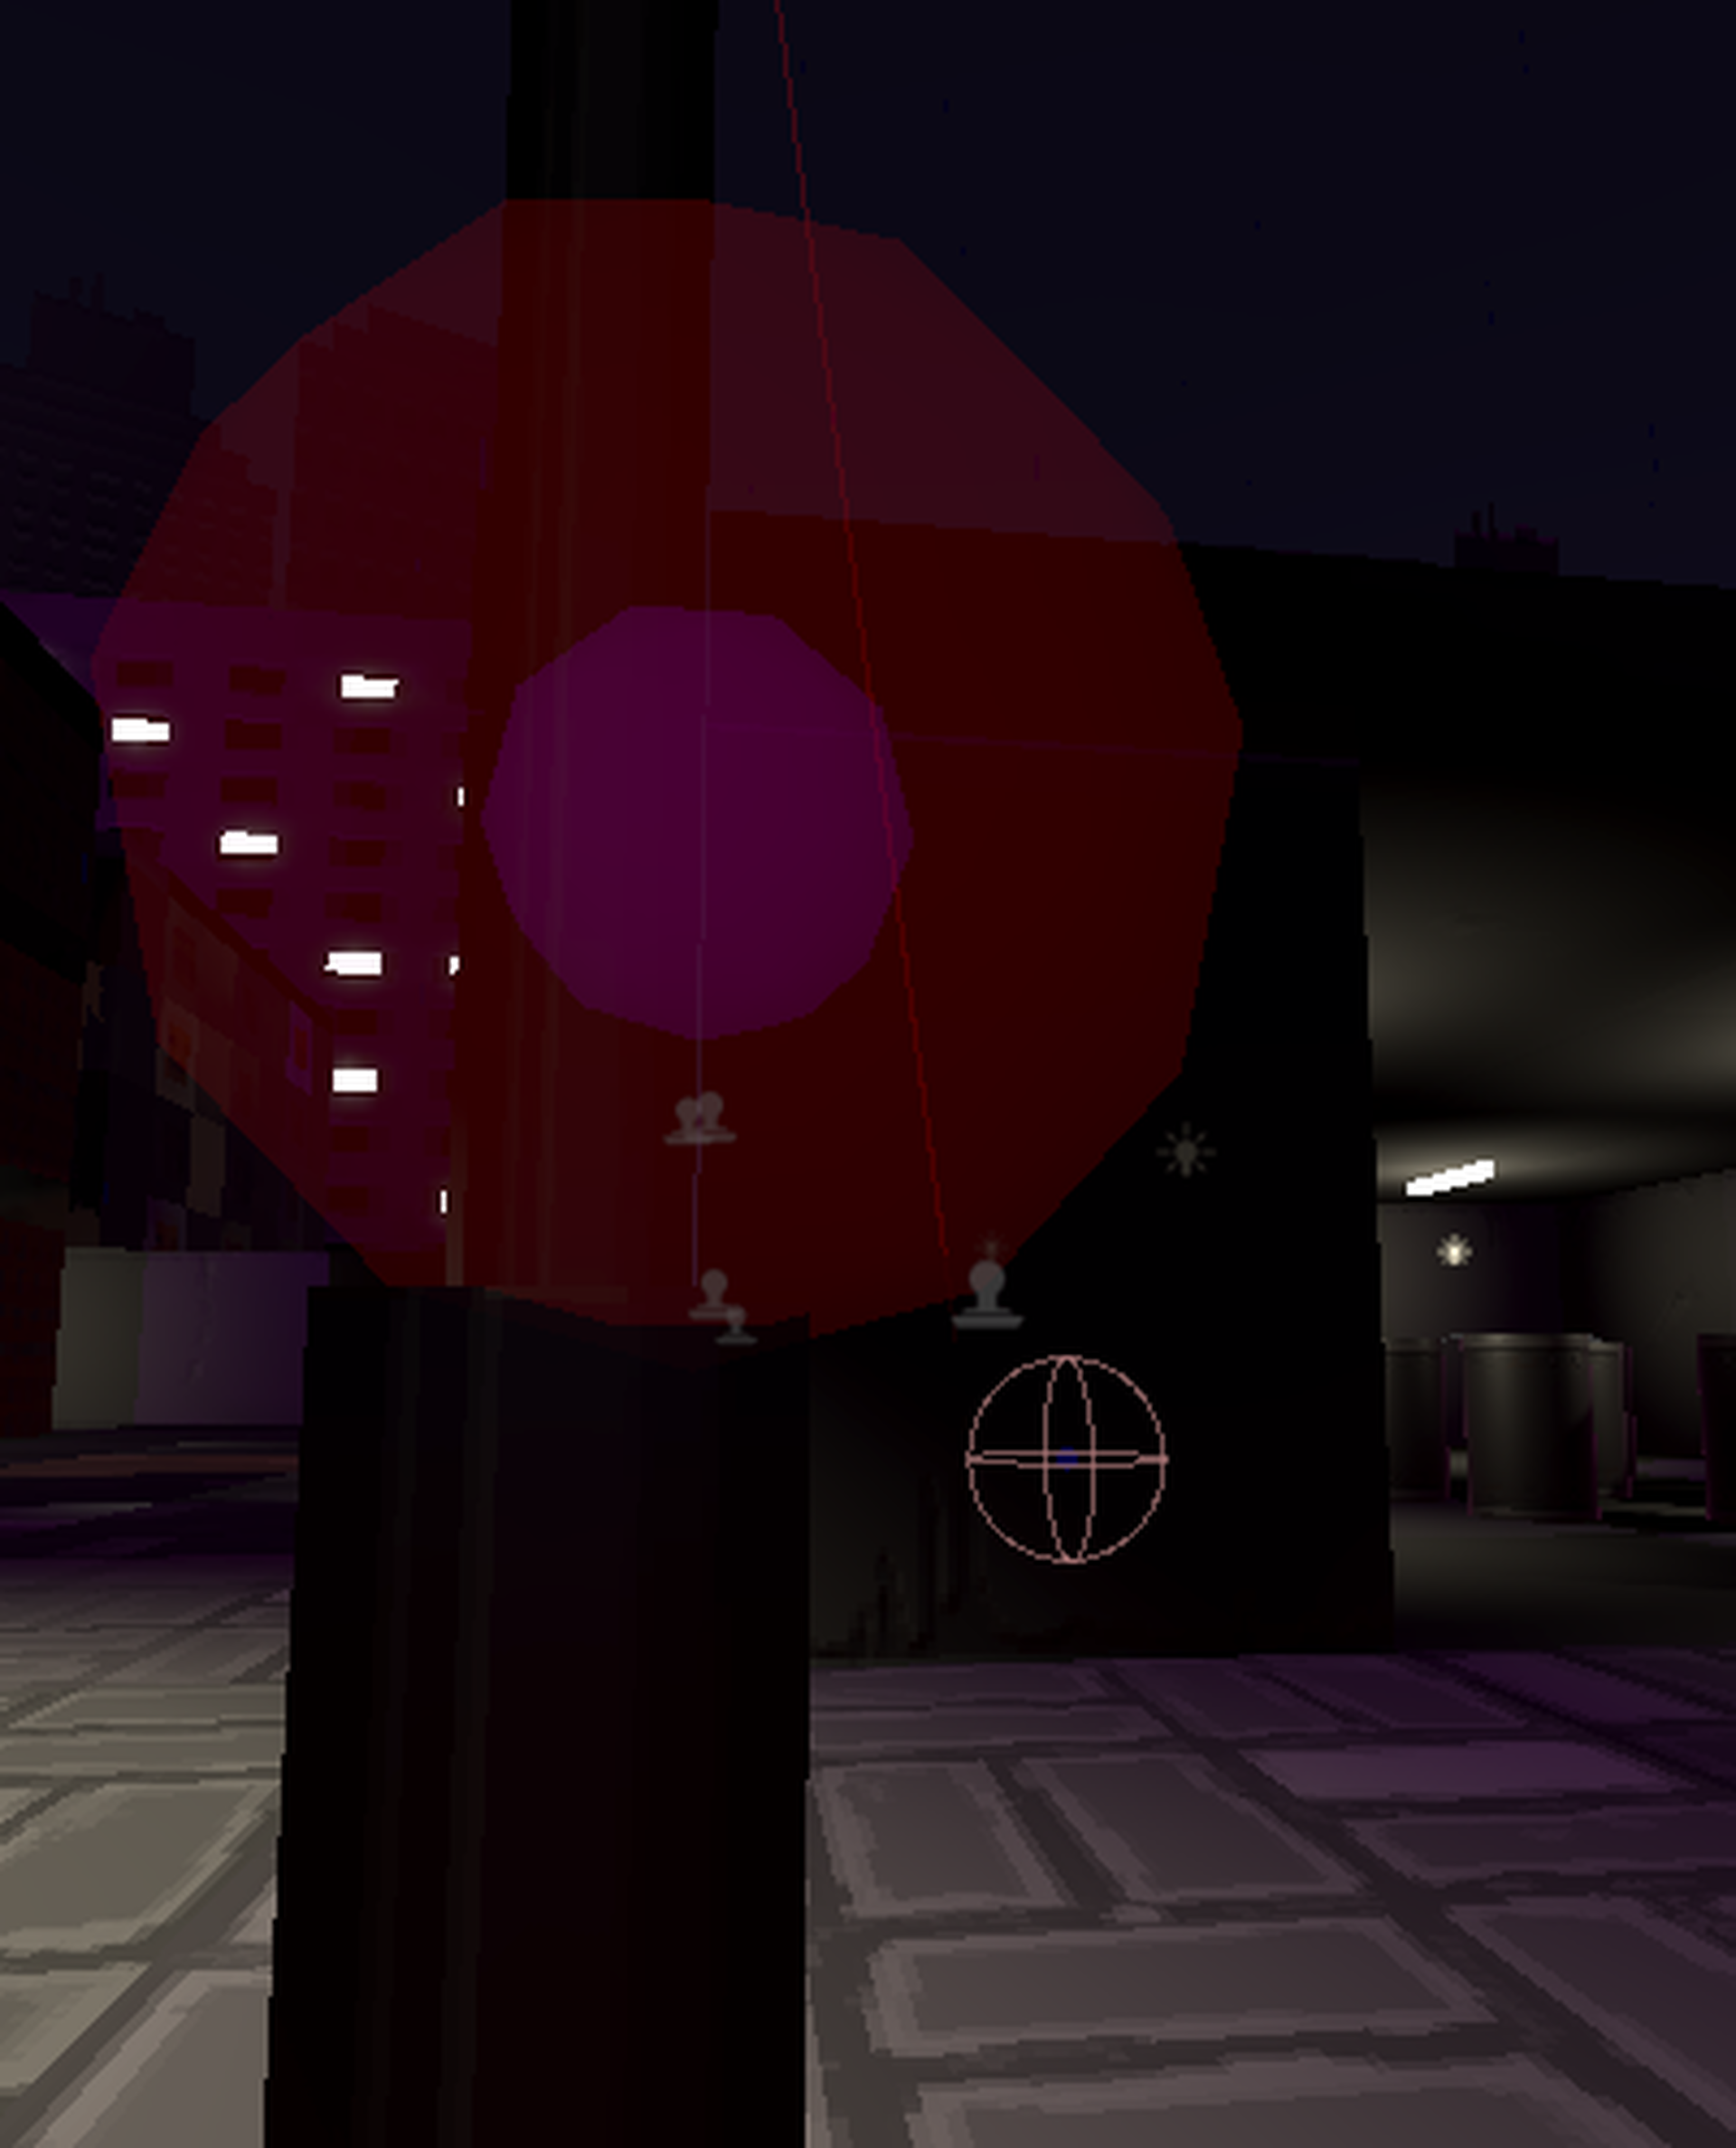
In the picture below, the pink spherecast represents the line of sight to the target. The size of the sphere shows the “eye sharpness,” or how much nearby objects block the vision.
The red spherecast is used to check if there is another AI in front of us. To avoid issues where the AIs shoots too close to each other, we found that making the red spherecast slightly larger was the most effective solution.
Later on, I improved that by implementing a feature that makes the AI take a sidestep if there is another AI in front of them.

In addition to using spherecasts, I also used a DrawWireSphere gizmo to debug the AI’s hearing function.
When the target fires a shot, it places a DrawWireSphere at that exact position. This position also serves as the point of interest for the AI to inspect.
This helped to visually confirm that the AI was functioning correctly in all scenarios.
The game code is not currently available to the public because we are still actively working on it and it contains proprietary files.
If you have any questions, my contact information is in the footer, or alternative you can use the contact form on this website.
Edit 2023/01/5 :
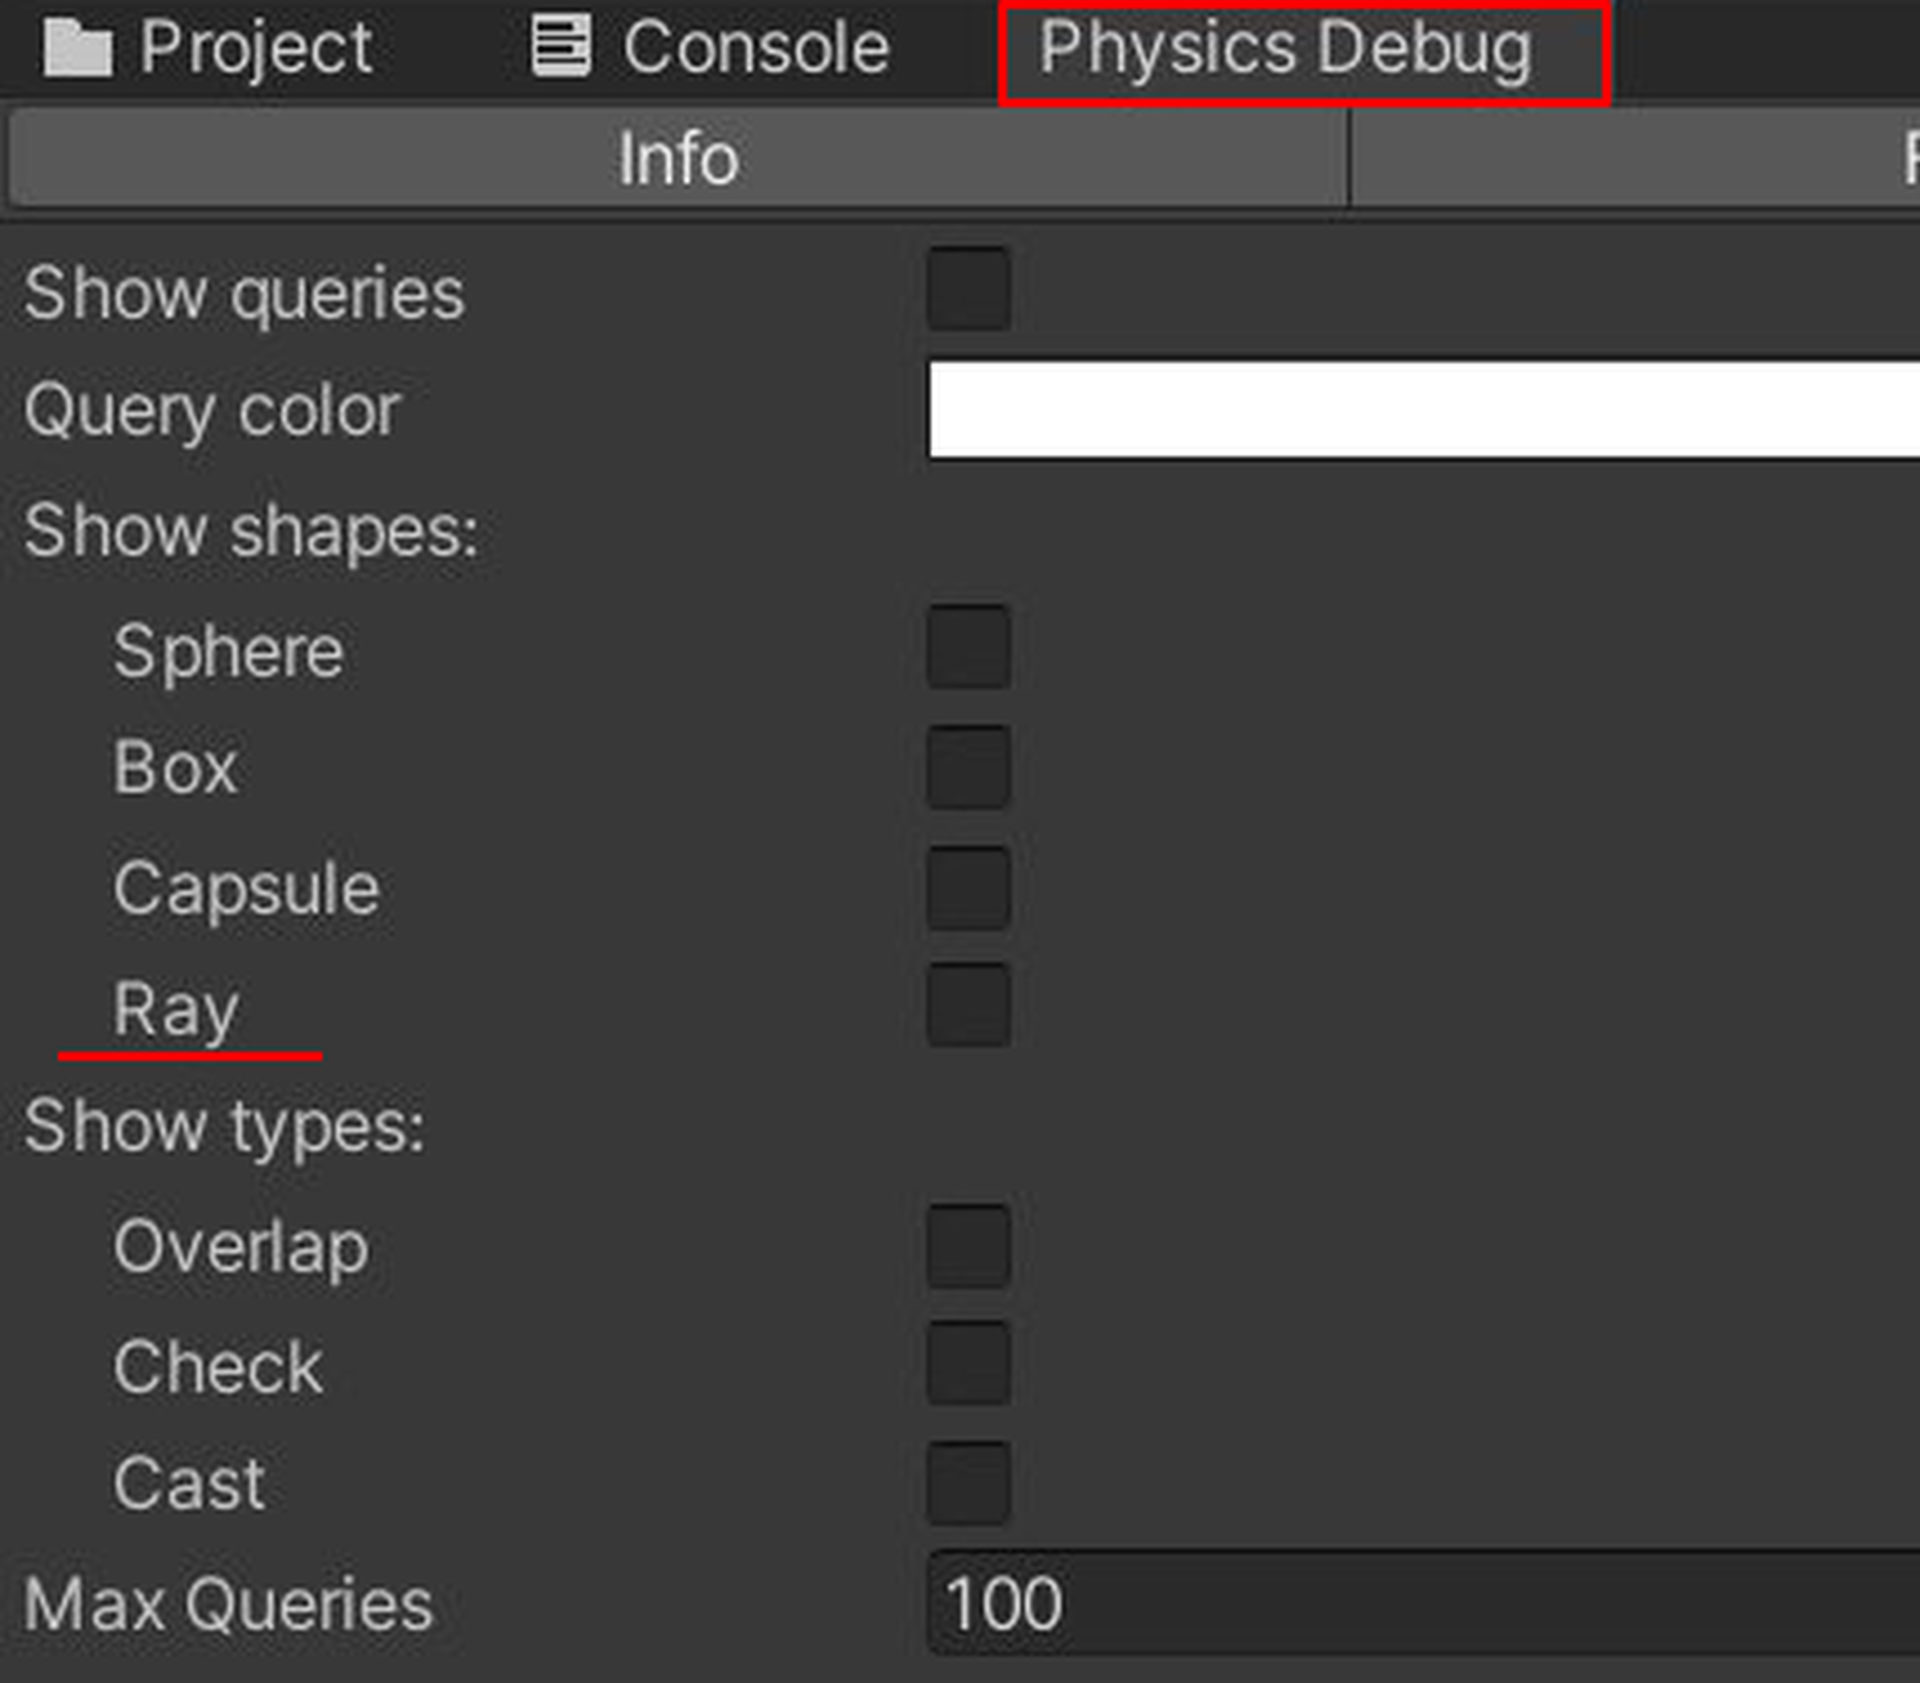
The latest version of Unity includes a built-in debugger for rays that can potentially make the gizmo drawing for rays quite unnecessary.
However, I am unaware if it supports features such as spherecasts or the ability to draw shaped gizmos on collision points as I haven’t had the opportunity to test it out yet.

Edit 2024/07/8 :
Cleaned the text a bit, and included some up to date information relating to the AI.